Making a dumb gas boiler smart with Shelly and Home Assistant
⚠️ DANGER - HIGH VOLTAGE WARNING
This procedure involves working with lethal 230 VAC mains electricity and presents serious risk of electrocution, fire, property damage, and death. This guide is for informational purposes only and is intended solely for licensed, qualified electricians. If you are not a certified electrician, DO NOT attempt any part of this procedure. By reading and using any information in this post, you acknowledge and agree that you assume all risks associated with this procedure. The author provides no warranty, guarantee, or representation regarding the accuracy, completeness, or safety of this information. The author accepts no liability whatsoever for any injury, death, fire, damage to gas boilers or electrical systems, voiding of warranties or insurance coverage, violation of electrical codes, or any other losses arising from use of this information. You are solely responsible for ensuring compliance with all applicable laws, codes, and regulations.
Background story
Feel free to skip this section if it’s of no interest to you.
It all started with some sweaty nights under our very warm duvet. We had, for once more, forgotten to dial down the gas boiler thermostat a few hours before going to bed and it kicked in during the night. Once the radiator started heating the bedroom, we would wake up several times from the heat to remove the duvet and drink water. In my endless quest to make every possible thing in the house smart, this seemed like the next best thing to tackle.
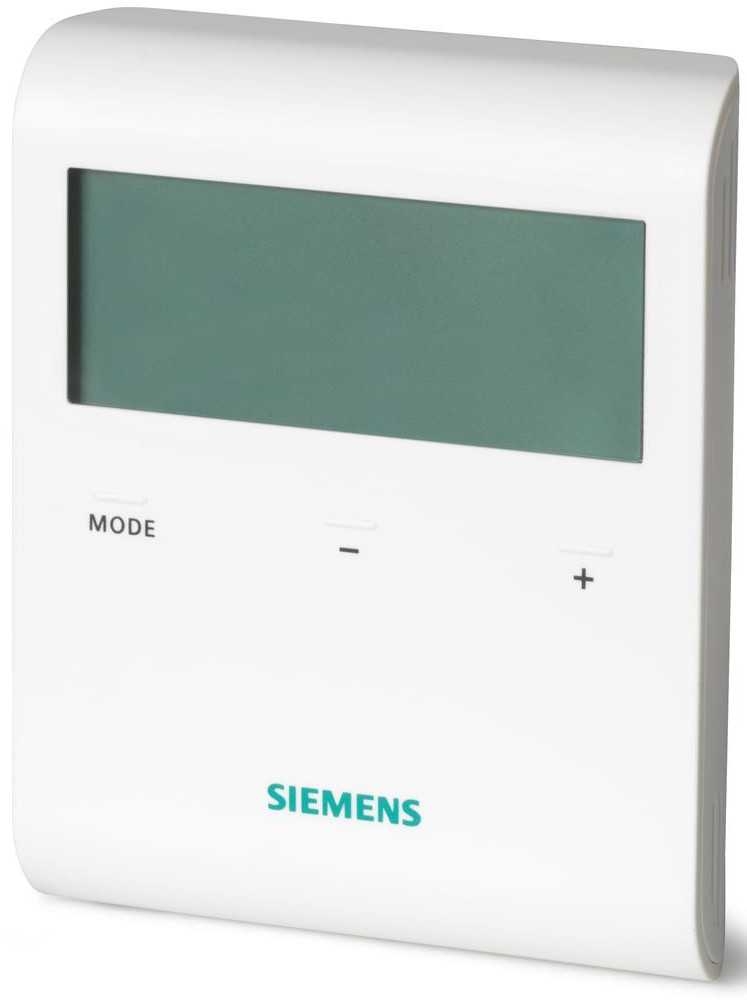
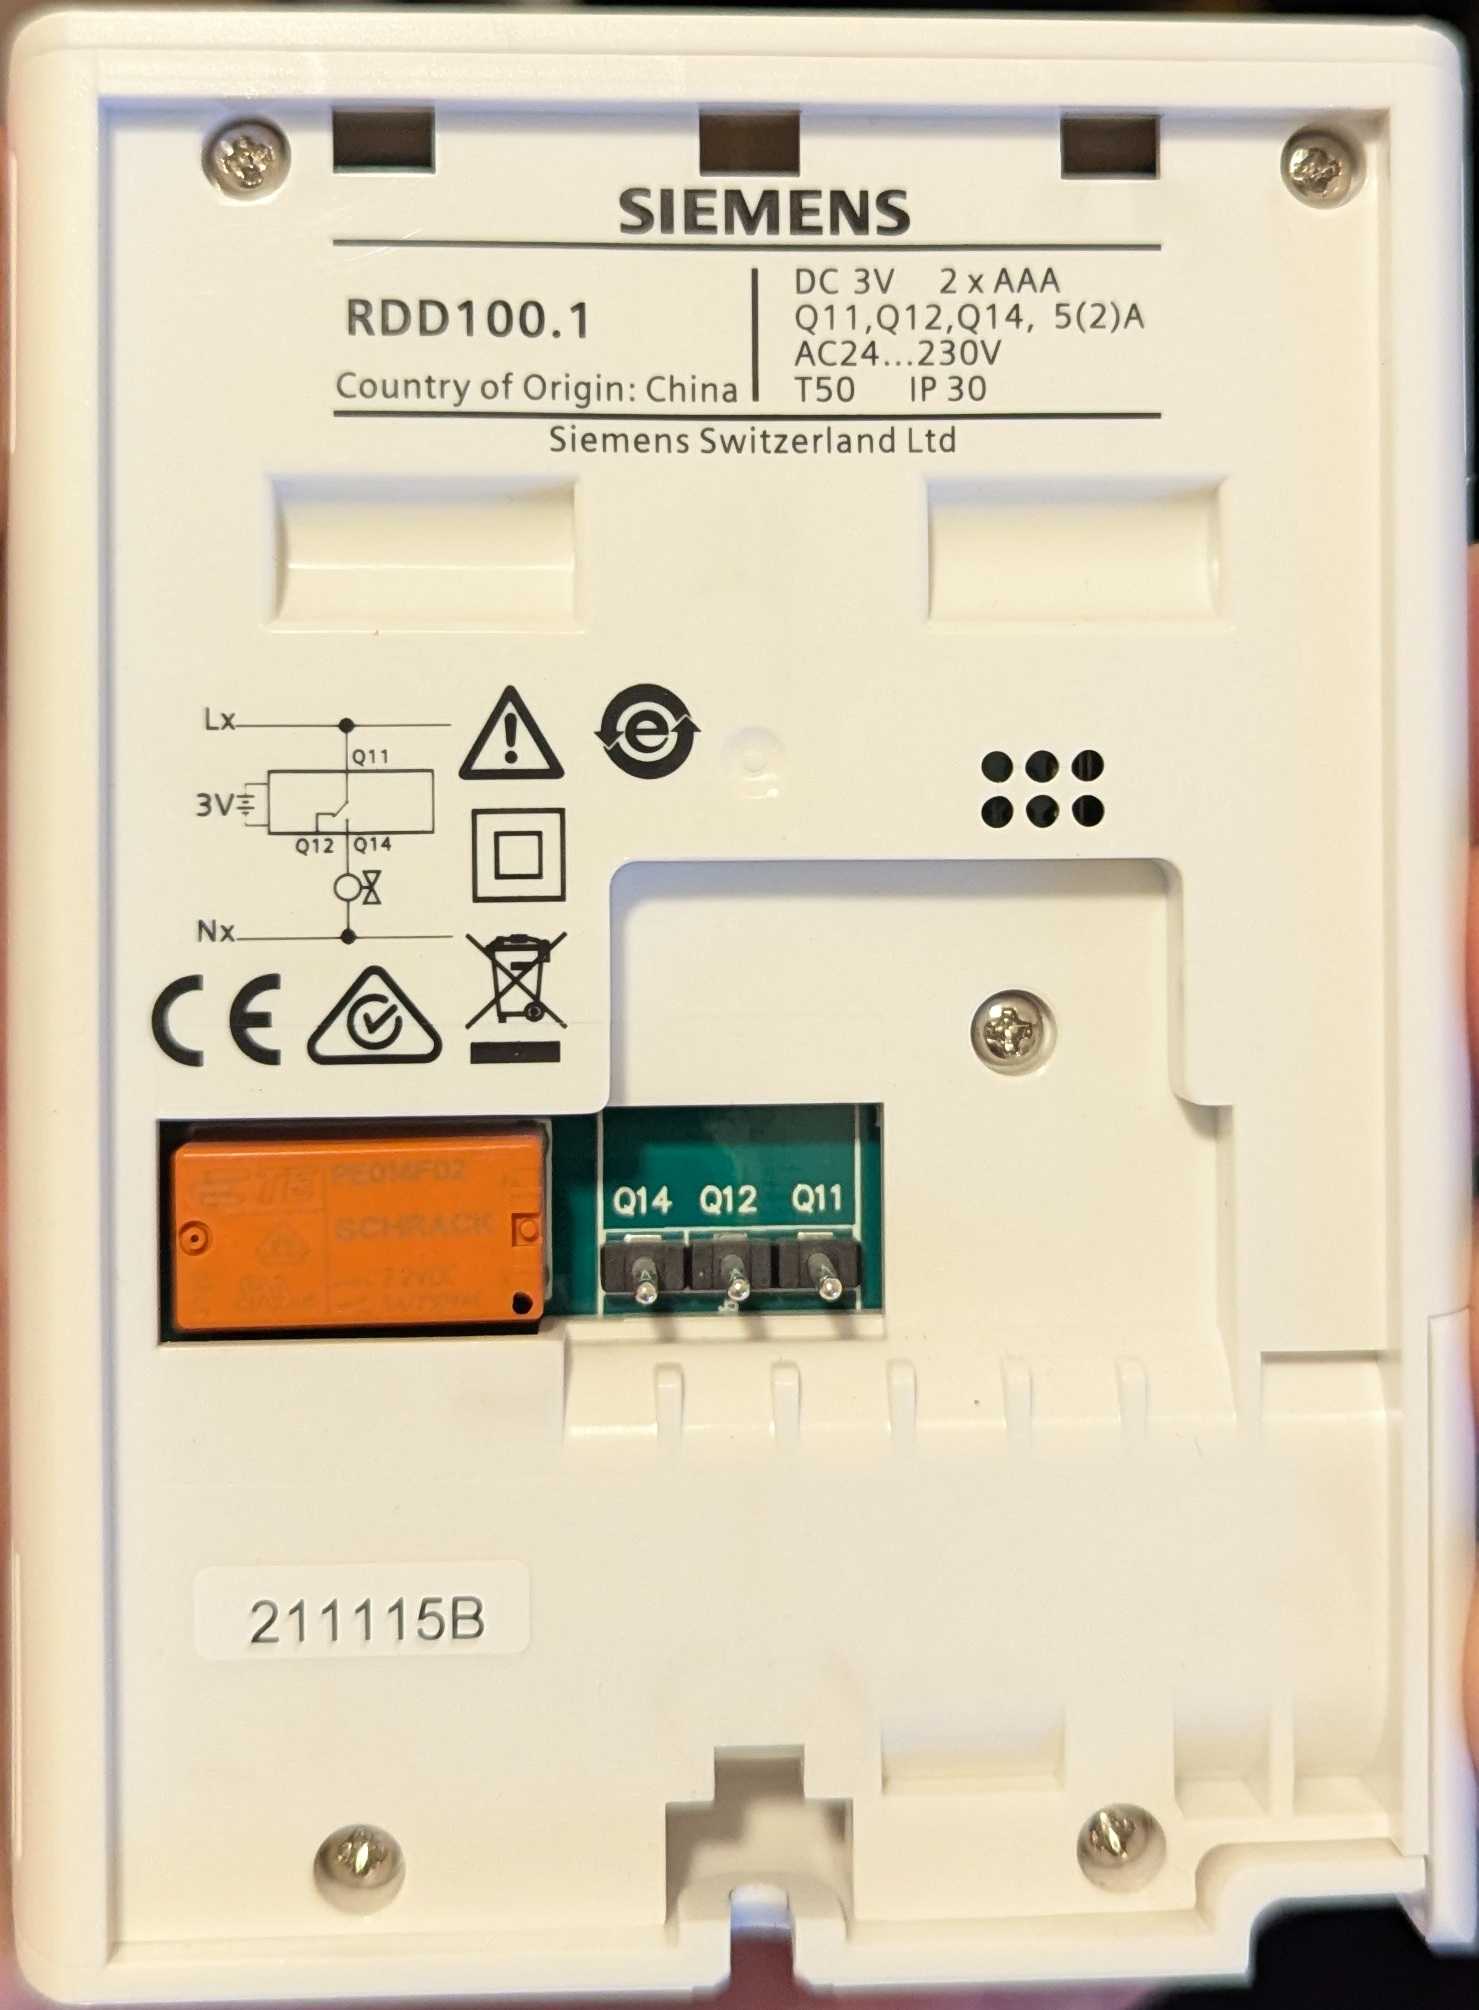
I started by examining our existing thermostat, a Siemens RDD100.1 You can tell just by the name that this thing is a disaster. The target temperature +/- buttons work some of the time, the screen has no backlight and there is no way to see both the target temperature and the actual temperature of the space. Moreover, it suffers from what most dumb thermostats usually do: their location is not in the main living space, so once they reach the target temperature e.g. in the hallway, they turn off the boiler even if the main living space is still cold.
I removed the device and was left with a mounting plate that had 2 wires connected to 2 pins (out of 3 pins in total) Using a multimeter, I measured 24 VDC. Based on the fact that the thermostat ran on 2 AAA alkaline batteries and produced an audible “clack” sound each time the gas boiler turned on/off, I figured this was the sound of a latching relay (keeps its position without consuming power) and the 2 wires were the control signal circuit from the boiler: a closed/open circuit turned on/off the gas boiler. This seemed like a perfect fit for a Shelly 1 Gen4 smart switch that has dry (a.k.a. potential-free) contacts, which means the switch is electrically isolated from the circuit it’s switching; exactly what the dumb thermostat was doing. I chose Gen4 to try out the Zigbee support, which turned out to work pretty well (more on that later)
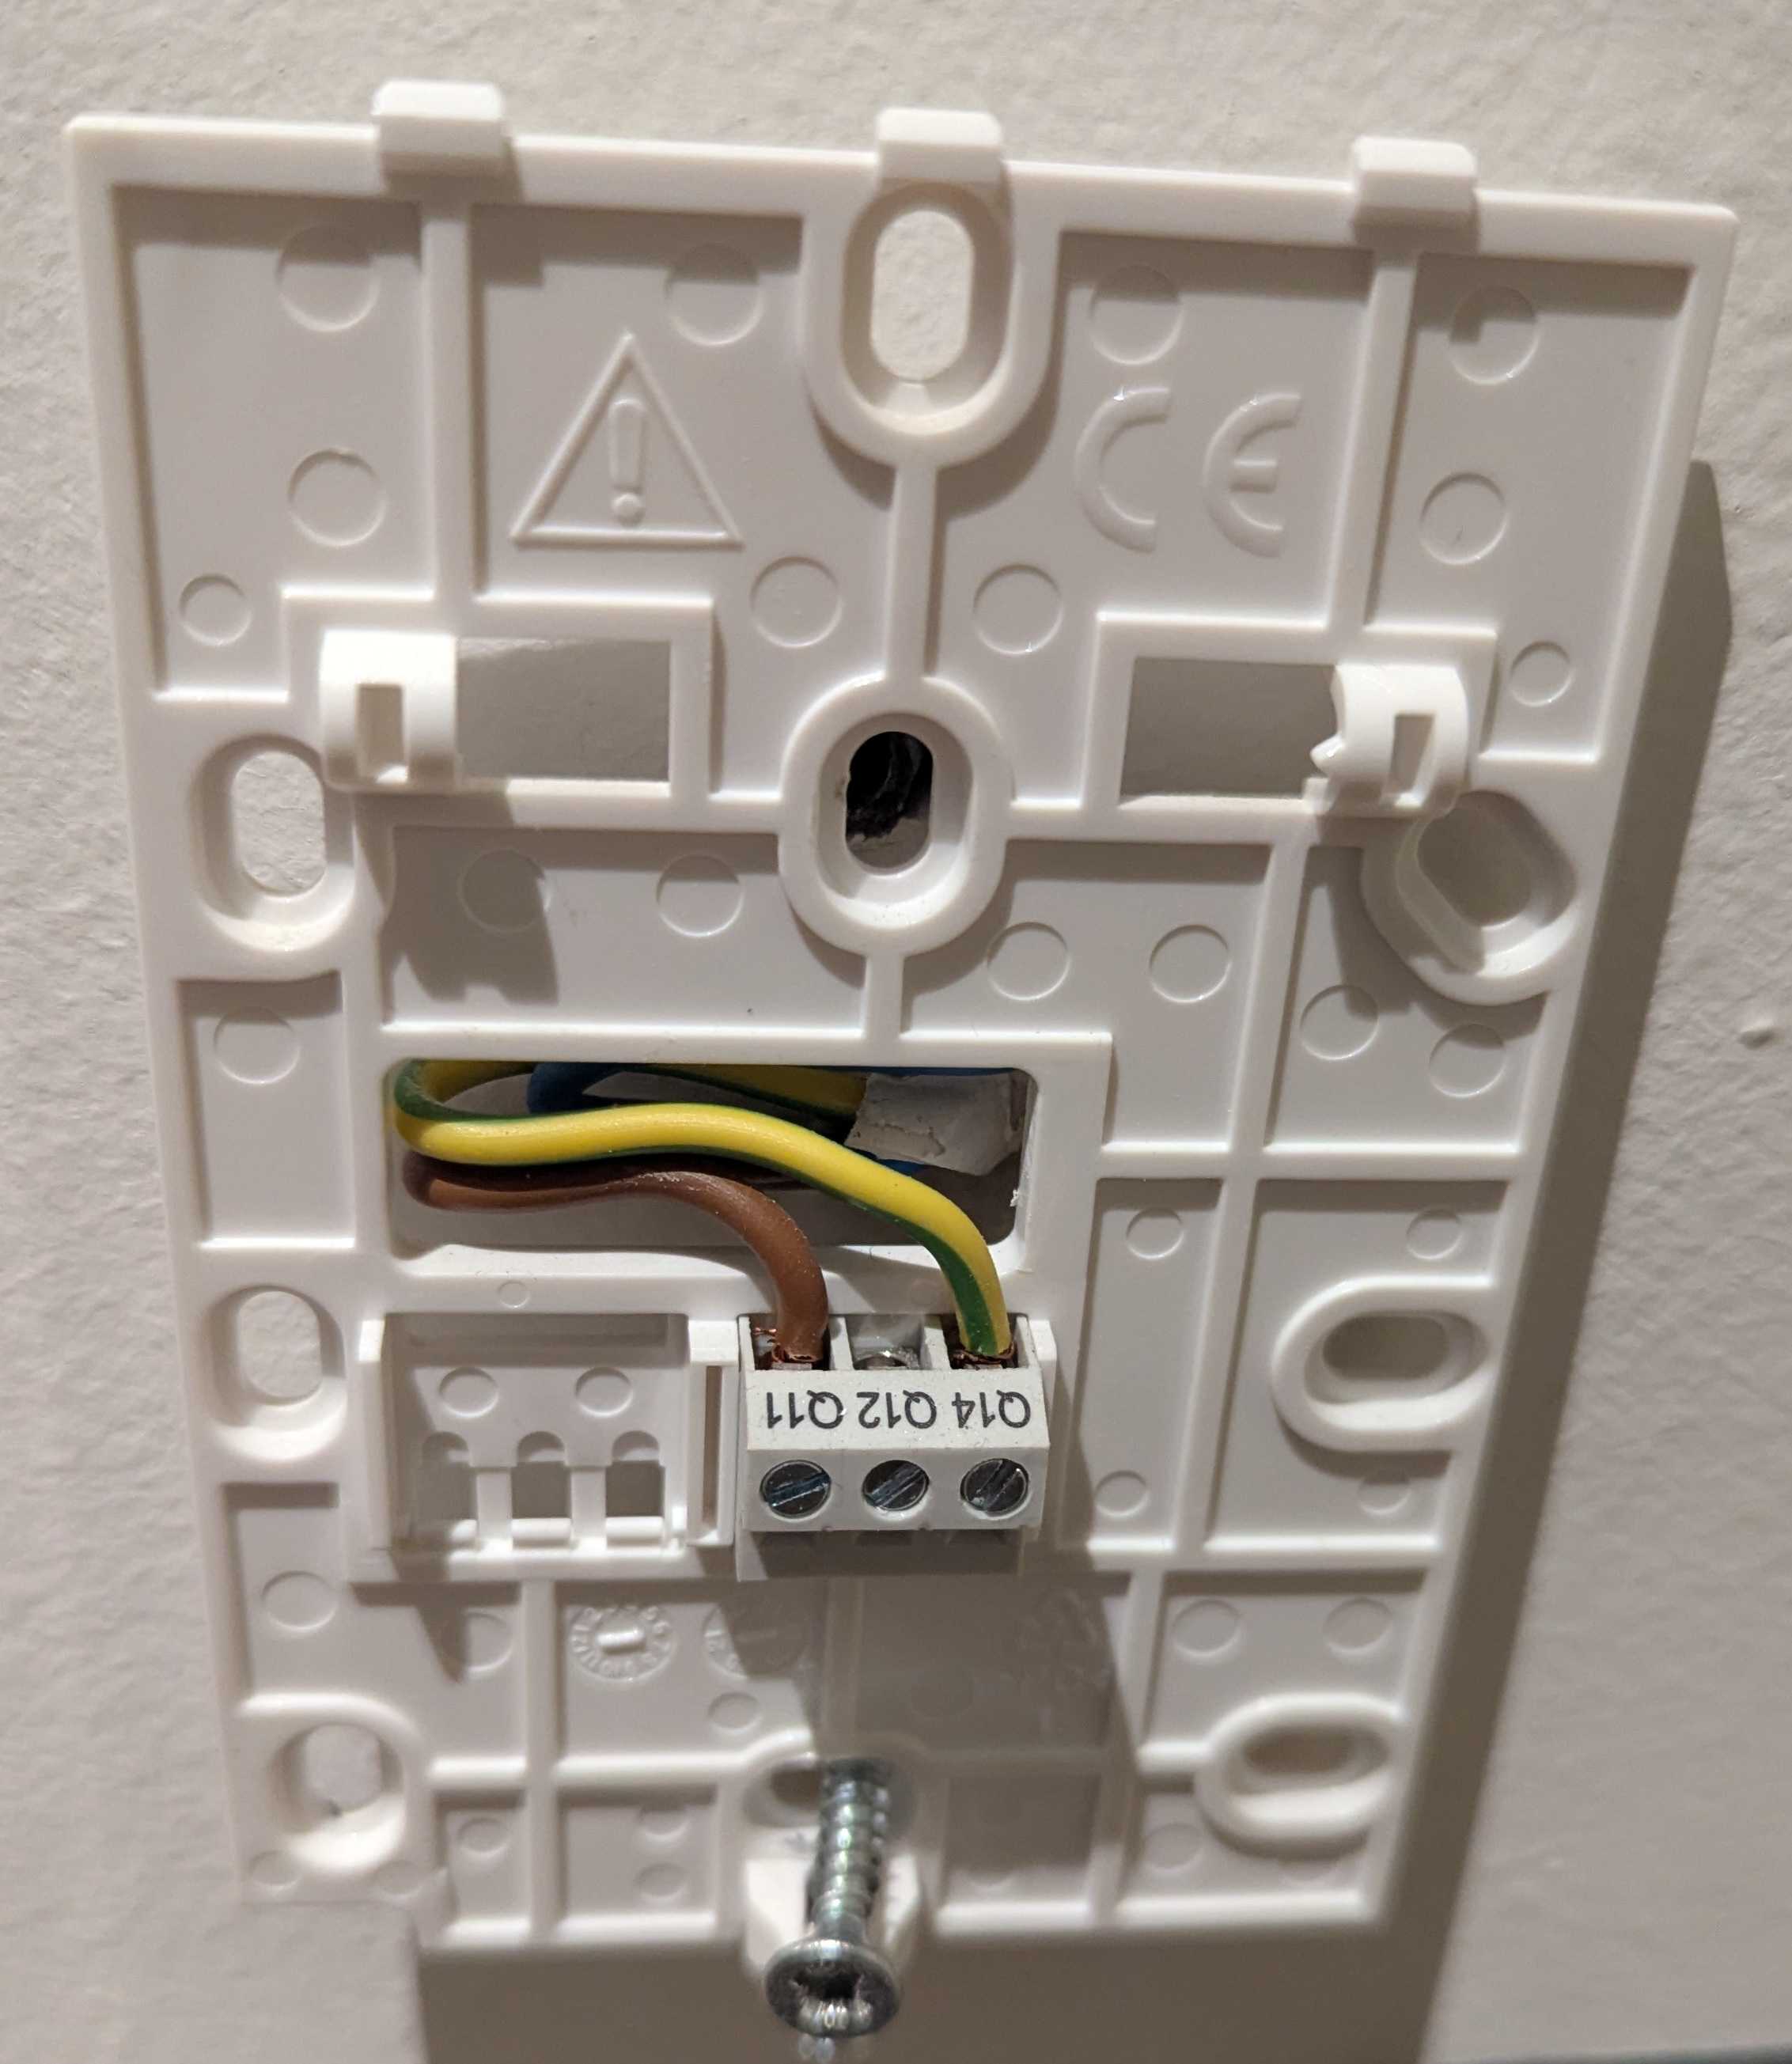
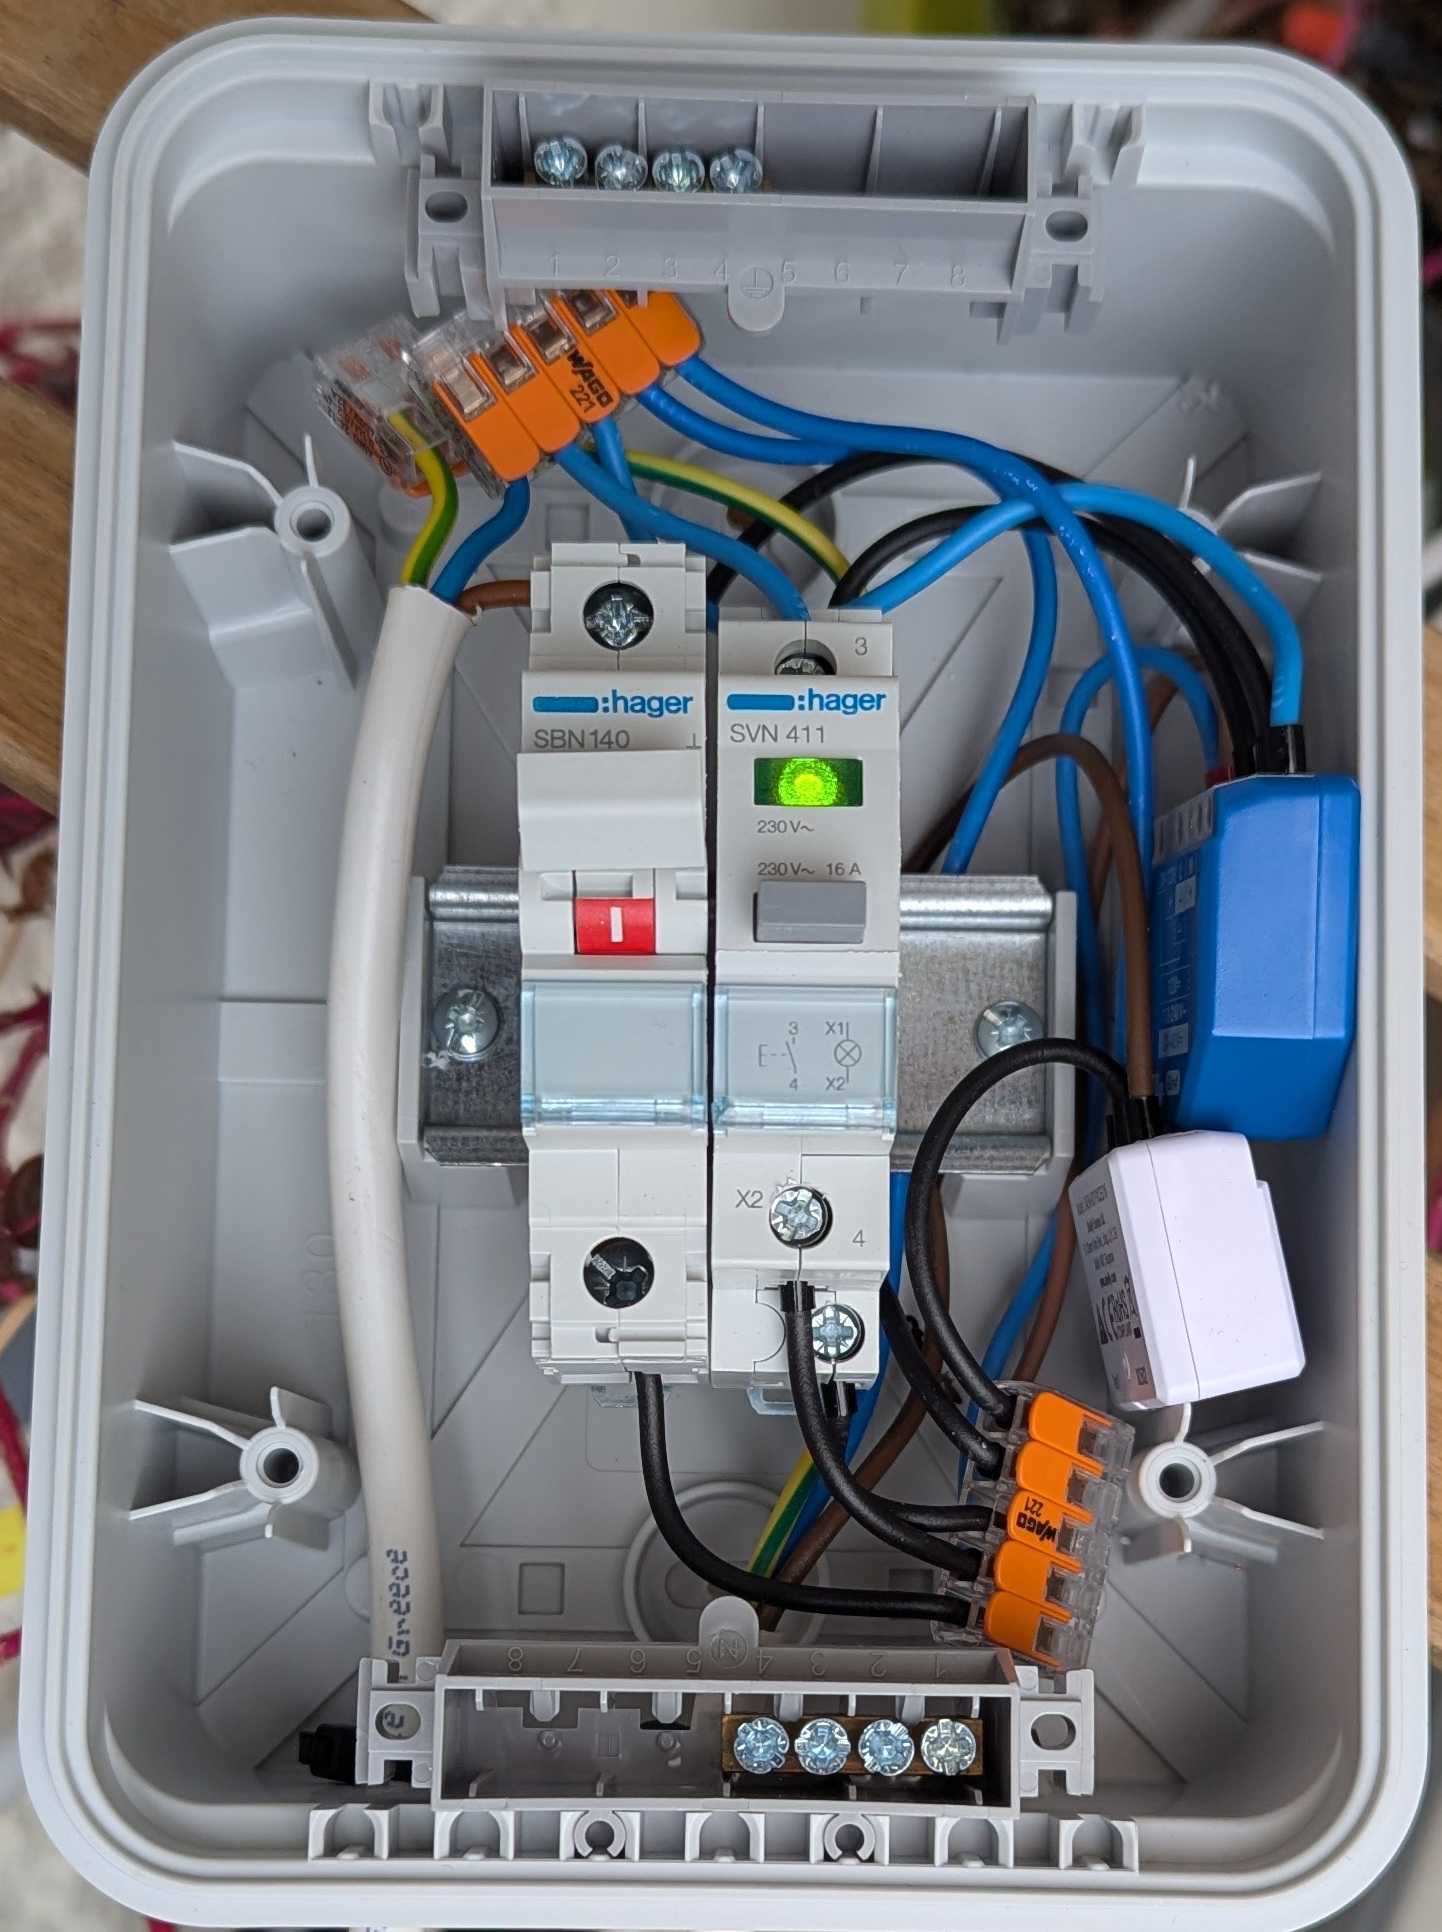
I quickly realized there’s no 230 VAC power near the legacy thermostat to power the Shelly. In Greece, regulations require gas pipelines terminating outside to avoid potentially lethal leaks, so all gas boilers in apartments are installed in balconies and have a dedicated exhaust. This meant I had to place the Shelly outside, next to the boiler. I figured this would be no problem if I used a waterproof electrical panel enclosure to house the Shelly and any cabling. To power everything, I’d disconnect the power cable from the gas boiler, use it inside the enclosure and then continue outside to the boiler to power that as well. To replace the thermostat, I would disconnect the thermostat contacts from the gas boiler thermostat terminals (marked “E1” on the gas boiler circuit board) and connect the Shelly’s I/O dry contacts instead.

To make the installation more complete, I ended up adding:
- Power switch (DIN rail) to cut off power e.g. for maintenance (the apartment has no dedicated switch for the gas boiler - duh!)
- Backup push button (DIN rail) to turn on/off the Shelly manually (e.g. in case I can’t do it from Home Assistant) with a LED to signify whether there’s power or not (more on that later)
- Shelly EM Mini Gen4 to measure the consumption as well as when the gas boiler is on: apart from heating, the gas boiler also works independently when there’s demand for hot water
- Some Wago clamps for all electrical connections
- Flexible, multi-strand, insulated (NYAF) 3-wire cable terminated with ferrules; 1.5 mm² wide for powering the Shelly/boiler and 1 mm² wide for the control signal (24 VDC)
- Tie-wraps around the cables for strain relief
Note: All of the above is already behind a 10 A circuit breaker in the main electrical panel.
Electrical diagram
Here’s the diagram I sketched before assembling everything:
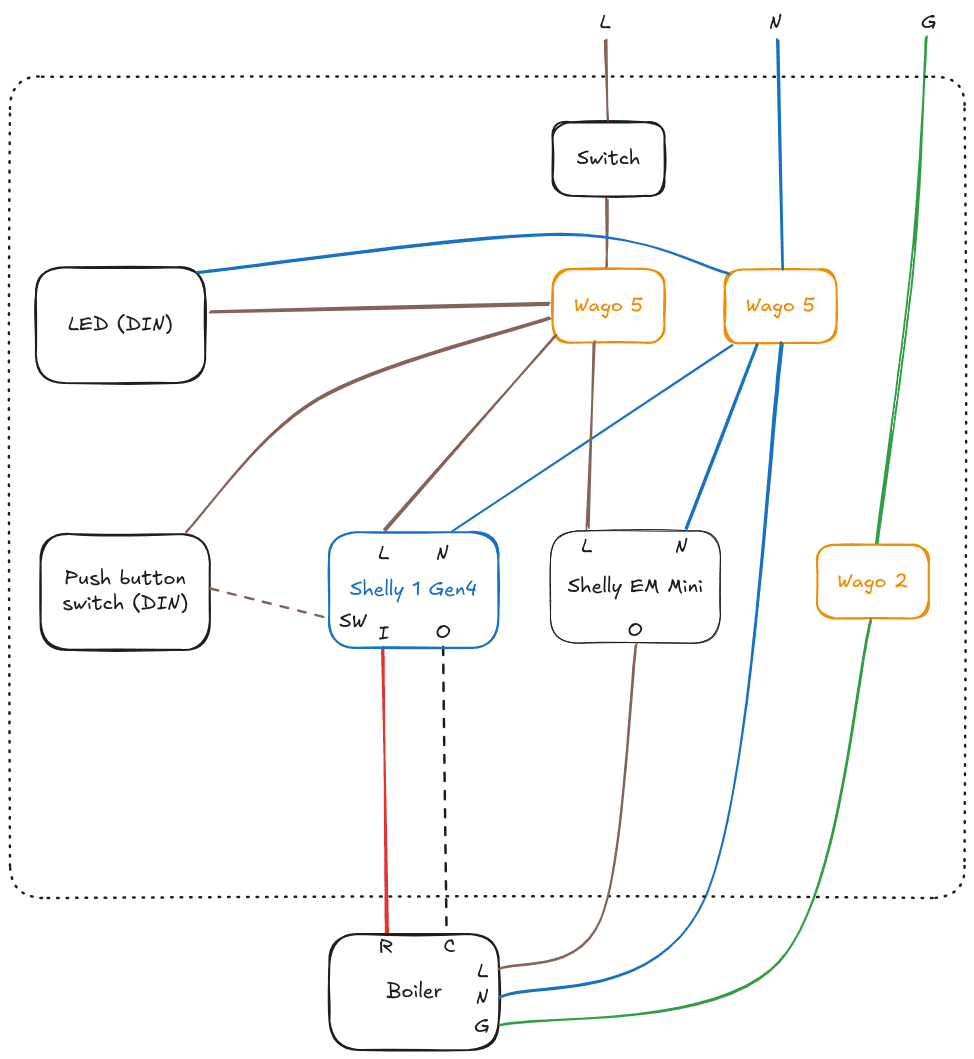
Legend:
- Brown/Blue: 230 VAC Live/Neutral
- Green: Ground
- Red/Black: Gas boiler signal (24 VDC)
- Dashed line means “switching”
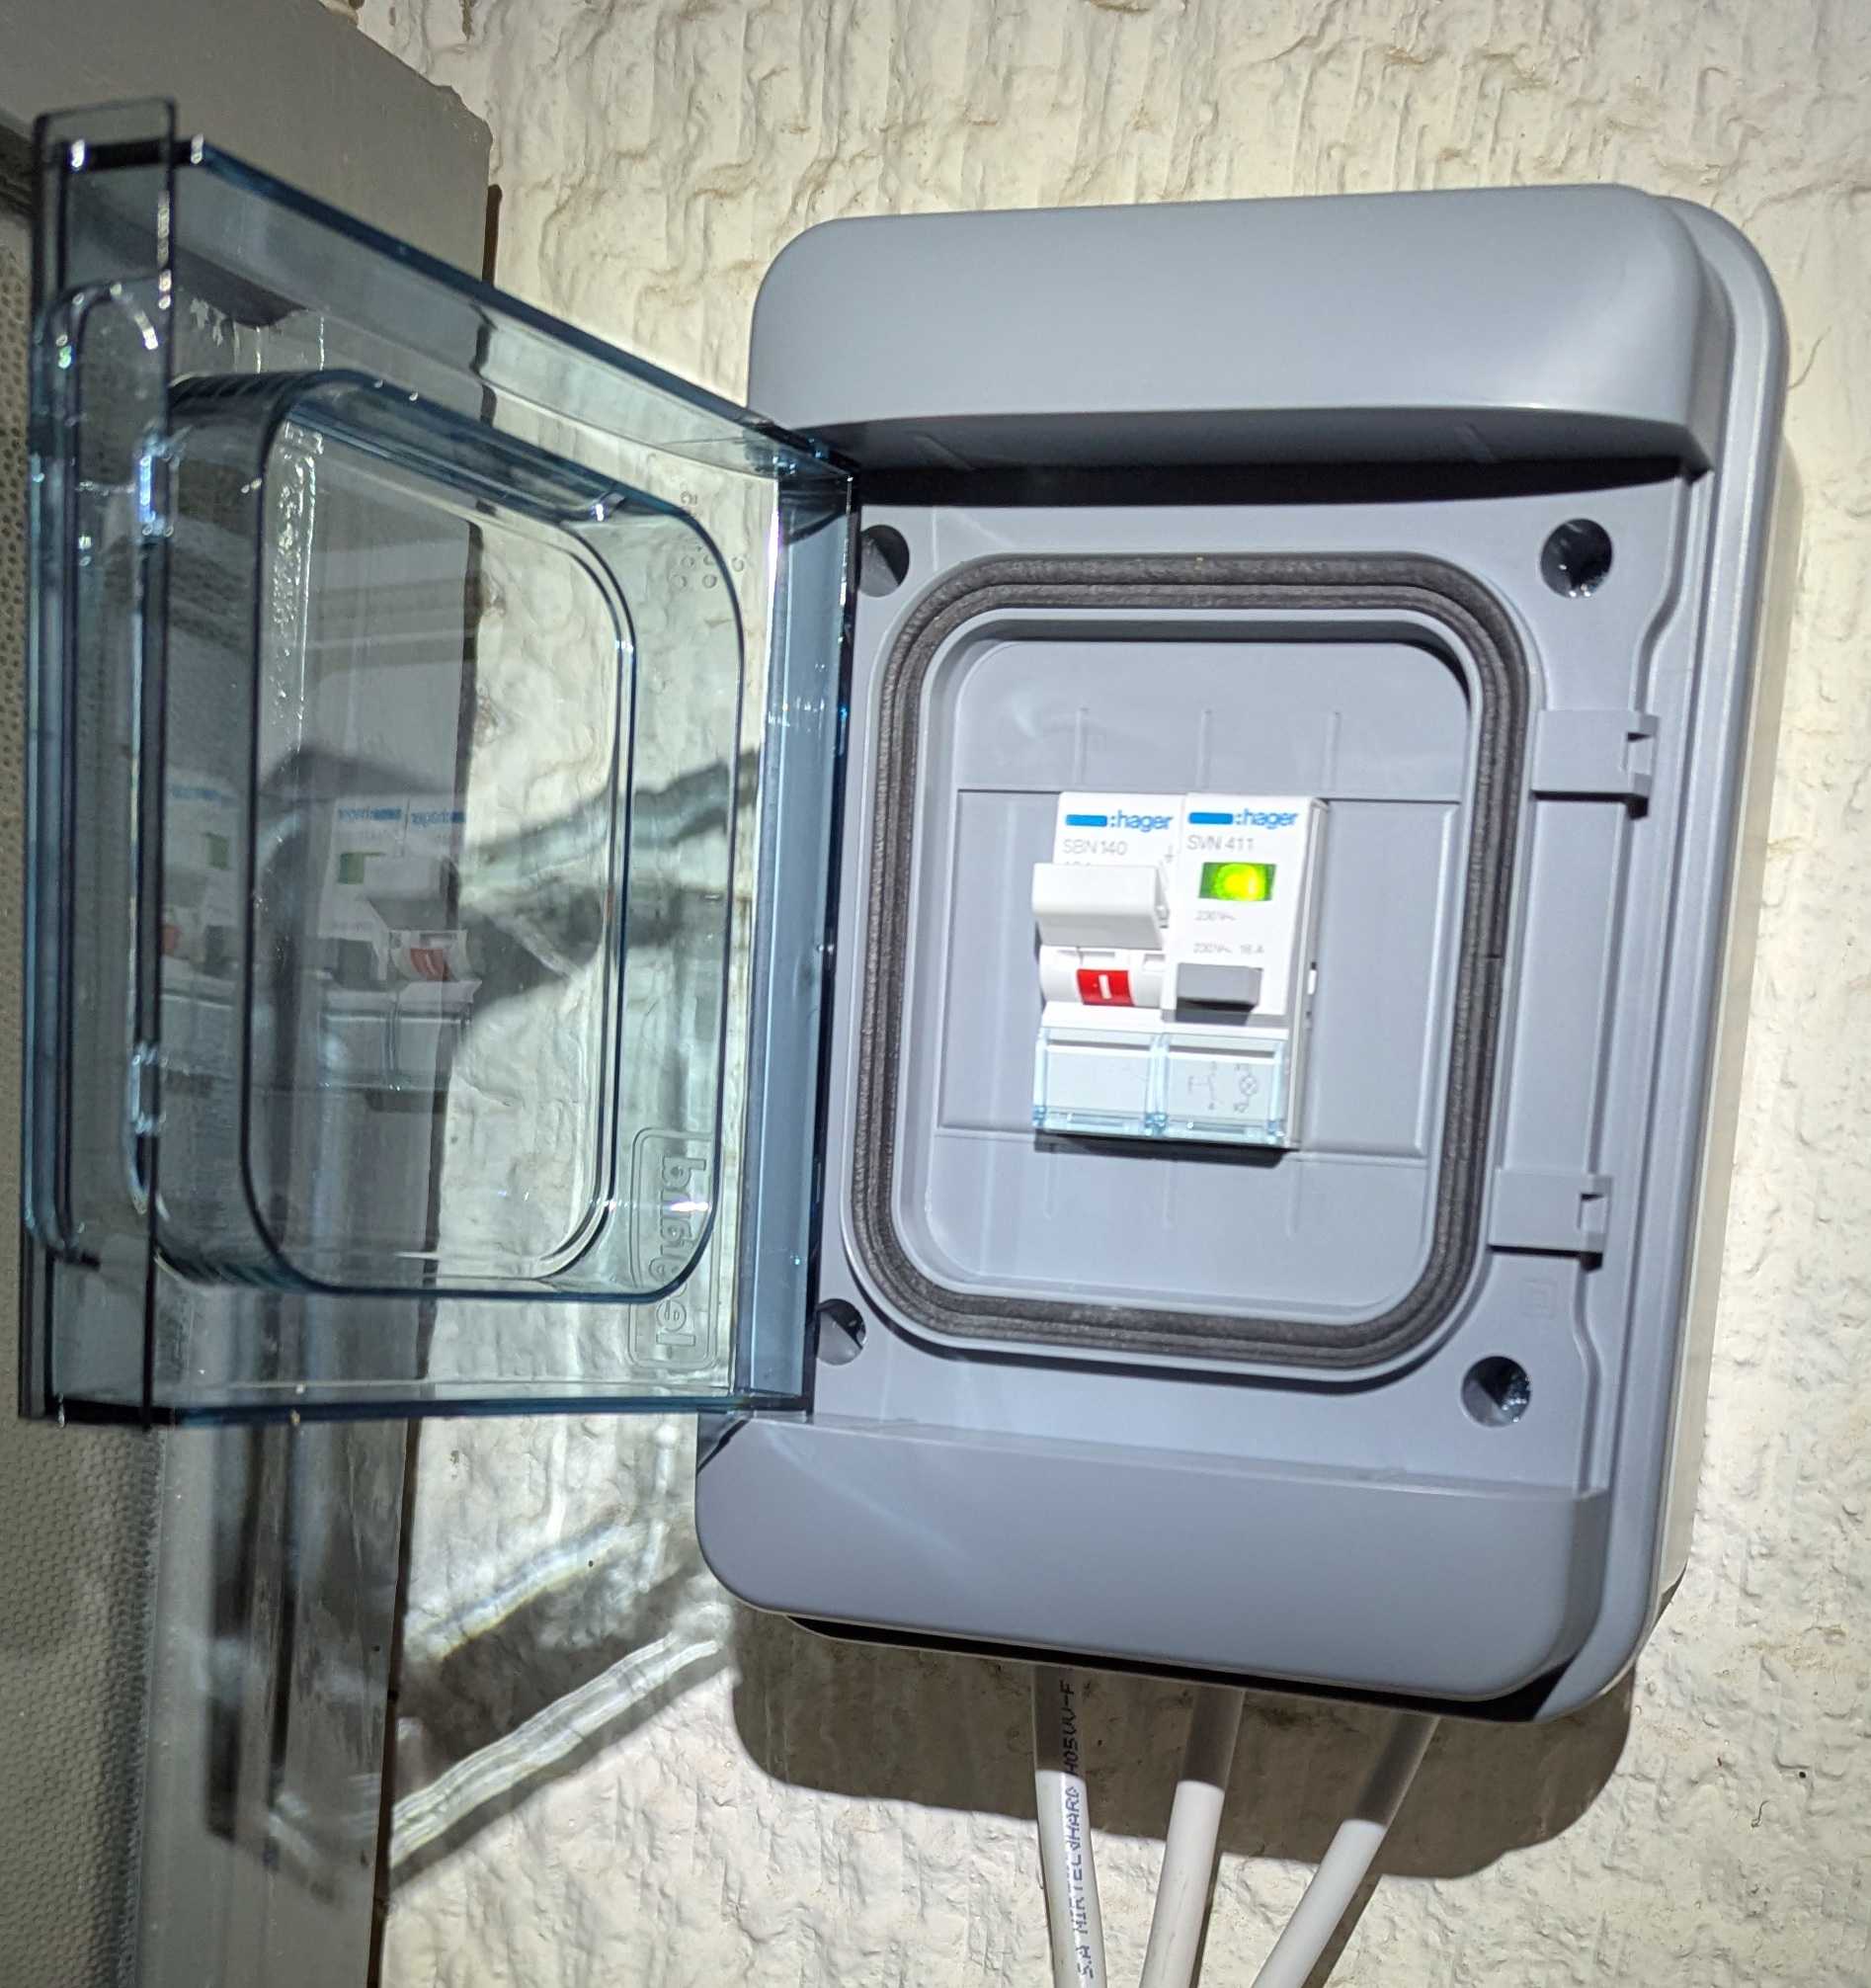
Assembled panel
The final result:
Setup in Home Assistant
Adding the Shelly devices in Home Assistant with Zigbee turned out to be easy and I didn’t have to use the Shelly app at all. I used an electrically insulated screwdriver (Shelly devices are powered by 230 VAC and touching them can be lethal!) to quickly press 5 times the reset button on the back of each device and it switched to Zigbee mode. I then went to the Home Assistant Zigbee integration page and watched the devices get discovered!
Sadly, I quickly found out configuring the Shelly 1 input to be a push button (instead of a persistent on/off switch) in Zigbee mode is not supported yet by the firmware. Support is coming with the 1.8 version though and then ZHA has to ship a version that supports it as well. But I can wait.
To operate the gas boiler in Home Assistant, I installed the Generic Thermostat integration and picked the Shelly 1 as the switching device. For the temperature sensor, I set up a template temperature sensor that takes the minimum temperature between the bedroom and the bathroom. This solved the “warm hallway, cold living room” problem I mentioned earlier! To do this, I placed the following code in configuration.yaml using the File editor add-on:
template:
  - trigger:
      - platform: state
        entity_id:
          - sensor.temp_1
          - sensor.temp_2
      - platform: time_pattern
        minutes: "/1"   # backstop: update every minute
    sensor:
      - name: "Heating thermostat temperature"
        unique_id: heating_thermostat_temperature
        unit_of_measurement: "°C"
        device_class: temperature
        state_class: measurement
        state: >
          {% set t1 = states('sensor.bedroom_thermometer_temperature') | float(none) %}
          {% set t2 = states('sensor.bathroom_thermometer_temperature') | float(none) %}
          {% if t1 is none and t2 is none %}
            {{ 'unknown' }}
          {% elif t1 is none %}
            {{ t2 }}
          {% elif t2 is none %}
            {{ t1 }}
          {% else %}
            {{ [t1, t2] | min }}
          {% endif %}
Note that you need to restart Home Assistant for the changes to take effect.