Μετεωρολογικός σταθμός Αστεροσκοπείου στο Home Assistant
🇬🇷
Το παρόν άρθρο περιέχει οδηγίες για το πώς μπορούμε να προσθέσουμε τα στοιχεία ενός μετεωρολογικού σταθμού του Αστεροσκοπείου Αθηνών στο Home Assistant π.χ. για να τα εμφανίσουμε σε κάρτα στο dashboard. Ως παράδειγμα τοποθεσίας χρησιμοποιείται ο μετεωρολογικός σταθμός του Βύρωνα.
Χρησιμοποιώντας το File editor Add-on, δημιουργούμε νέο φάκελο (directory) με όνομα packages (αν δεν υπάρχει ήδη) και μέσα του δημιουργούμε νέο αρχείο με όνομα meteo_vironas.yaml και περιεχόμενο:
meteo_vironas:
  scrape:
  - resource: 'https://penteli.meteo.gr/stations/vyronas/'
    headers:
      User-Agent: 'Mozilla/5.0 (Windows NT 10.0; Win64; x64) AppleWebKit/537.36 (KHTML, like Gecko) Chrome/131.0.0.0 Safari/537.3'
    scan_interval: 3600
    sensor:
      - name: Meteo Vironas last updated
        unique_id: meteo_vironas_last_updated
        select: .headline.gradient span
        index: 1
        value_template: '{{ (strptime(value, "%d/%m/%Y %H:%M") | as_local).isoformat() }}'
        device_class: timestamp
      - name: Meteo Vironas temperature
        unique_id: meteo_vironas_temperature
        select: .realtime .lright span
        value_template: '{{ value.split(" ")[0] | float }}'
        unit_of_measurement: '°C'
        device_class: temperature
      - name: Meteo Vironas humidity
        unique_id: meteo_vironas_humidity
        select: .realtime .lright span
        index: 1
        value_template: '{{ value.split(" ")[0] | float }}'
        unit_of_measurement: '%'
        device_class: humidity
      - name: Meteo Vironas wind speed
        unique_id: meteo_vironas_wind_speed
        select: .realtime .lright span
        index: 3
        value_template: '{{ value.split(" ")[0] | float }}'
        unit_of_measurement: 'km/h'
        device_class: wind_speed
      - name: Meteo Vironas barometric pressure
        unique_id: meteo_vironas_barometric_pressure
        select: .realtime .lright span
        index: 4
        value_template: '{{ value.split(" ")[0] | float }}'
        unit_of_measurement: hPa
        device_class: pressure
      - name: Meteo Vironas rain today
        unique_id: meteo_vironas_rain_today
        select: .realtime .lright span
        index: 5
        value_template: '{{ value.split(" ")[0] | float }}'
        unit_of_measurement: mm
        device_class: precipitation
Στη συνέχεια, πάλι στο File editor Add-on, πηγαίνουμε ένα επίπεδο πίσω και ανοίγουμε το αρχείο configuration.yaml προσθέτοντας:
homeassistant:
  packages: !include_dir_merge_named packages
Κάνουμε επανεκκίνηση στο Home Assistant.
Αυτό θα έχει ως αποτέλεσμα να δημιουργηθούν οι ακόλουθοι σένσορες:
meteo_vironas_last_updated— Ημερομηνία και ώρα τελευταίας ενημέρωσης (timestamp)meteo_vironas_temperature— Θερμοκρασία σε °C (temperature)meteo_vironas_humidity— Υγρασία σε % (humidity)meteo_vironas_wind_speed— Ταχύτητα ανέμου σε km/h (wind_speed)meteo_vironas_barometric_pressure— Βαρομετρική πίεση σε hPa (pressure)meteo_vironas_rain_today— Ύψος σημερινής βροχής σε mm (precipitation)
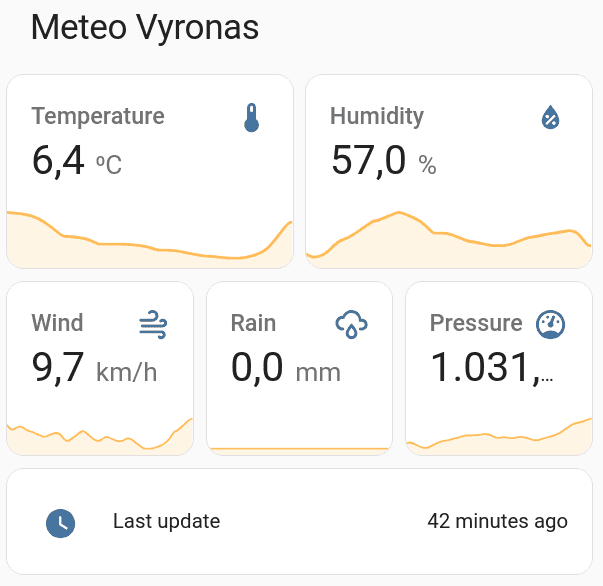
Ακολουθεί παράδειγμα κάρτας σε dashboard:
type: vertical-stack
cards:
  - type: vertical-stack
    cards:
      - type: horizontal-stack
        cards:
          - graph: line
            type: sensor
            entity: sensor.meteo_vironas_temperature
            detail: 2
            unit: ⁰C
            name: Θερμοκρασία
          - graph: line
            type: sensor
            entity: sensor.meteo_vironas_humidity
            unit: "%"
            detail: 2
            name: Υγρασία
      - type: horizontal-stack
        cards:
          - graph: line
            type: sensor
            entity: sensor.meteo_vironas_wind_speed
            detail: 2
            name: Άνεμος
          - graph: line
            type: sensor
            entity: sensor.meteo_vironas_rain_today
            detail: 2
            name: Βροχή
          - graph: line
            type: sensor
            entity: sensor.meteo_vironas_barometric_pressure
            detail: 2
            name: Πίεση
  - type: entities
    entities:
      - entity: sensor.meteo_vironas_last_updated
        name: Τελευταία ενημέρωση
    show_header_toggle: false
title: Meteo.gr Βύρωνας
Και το αποτέλεσμα: