Ajax Systems alarm system in Home Assistant
This post details how to integrate an Ajax Systems alarm system into Home Assistant so that it’s possible to both read and “write” (set) its state (armed, disarmed, night mode, triggered) This enables cool automations such as:
- “Disarm in the morning when I’m at home” — Also possible with the mobile app using schedules
- “Arm when I leave the vicinity of the home” — Somewhat possible with the mobile app using a geofence (you get a push notification when you leave the zone)
- “Turn on external lights when the alarm triggers”
Reading the state
This is possible with the SIA Alarm Systems Home Assistant integration. The documentation provides an easy-to-follow example on how to set it up for an Ajax Systems alarm, so it’s not covered here.
Note: Make sure you enter AAA as an Account ID and 45321 as a Port in order for the YAML samples (included later) to work.
After the setup is complete, we need to create an input_select to keep the alarm state between SIA and Home Assistant in-sync:
- Open your Home assistant installation
- Go to Settings → Devices & services → Helpers
- Click Create Helper
- Select Dropdown
- Enter
Alarmfor Name - Enter
mdi:shield-homefor Icon - Add the following options, one for each possible alarm state:
armed_away,armed_night,disarmed,triggered - Click Create
Now it’s time to create the necessary automations for the syncing. First the one from SIA to Home Assistant:
- Go to Settings → Automations & scenes
- Click Create Automation
- Select Create new automation
- Click on the three dots on the top-right of the screen
- Select Edit in YAML
- Replace the contents with the following YAML
- Click Save
- alias: Alarm sync from SIA
  triggers:
  - trigger: state
    entity_id:
    - alarm_control_panel.45321_aaa_zone_1_alarm
  conditions:
  - condition: template
    value_template: "{{ states('alarm_control_panel.45321_aaa_zone_1_alarm') != states('input_select.alarm') }}"
  actions:
  - action: input_select.select_option
    target:
      entity_id: input_select.alarm
    data_template:
      option: "{{ states('alarm_control_panel.45321_aaa_zone_1_alarm') }}"
Then the one from Home Assistant to SIA:
- Click Create Automation
- Select Create new automation
- Click on the three dots on the top-right of the screen
- Select Edit in YAML
- Replace the contents with the following YAML
- Click Save
- alias: Alarm sync to SpaceControl
  triggers:
  - trigger: state
    entity_id:
    - input_select.alarm
  conditions:
  - condition: template
    value_template: "{{ states('alarm_control_panel.45321_aaa_zone_1_alarm') != states('input_select.alarm') }}"
  actions:
  - data_template:
      entity_id: |
        {% if is_state('input_select.alarm', 'disarmed') %}
          switch.ajax_spacecontrol_disarm
        {% elif is_state('input_select.alarm', 'armed_night') %}
          switch.ajax_spacecontrol_night
        {% elif is_state('input_select.alarm', 'armed_away') %}
          switch.ajax_spacecontrol_arm
        {% elif is_state('input_select.alarm', 'triggered') %}
          switch.ajax_spacecontrol_panic
        {% else %}
        {% endif %}
    action: switch.turn_on
Setting the state
Ajax Systems does not provide a consumer-level API (only an enterprise one), so we have to do some hardware hacking to get it to work.
Necessary hardware
- Ajax SpaceControl key fob
- Wemos D1 Mini (I bought it from AliExpress)
- Thin (~0.5 mm) soldering wire with flux core (preferably lead-free, otherwise it’s toxic when inhaled)
- Spool of 22 (or similar) AWG tinned, flexible copper wire
Necessary tools
- Soldering iron, ideally with temperature adjustment
- Two (2) helping hands for soldering
- Wire cutter and stripper (for 22 AWG or similar)
Preparation steps
- Connect the key fob to your alarm system Make sure pressing Arm, Disarm, Night Mode and Panic works.
- Open the key fob and remove the integrated circuit board (ICB) Store its plastic enclosure somewhere safe in case you ever need it.
- Remove the battery from the key fob ICB as the whole thing is going to be powered by the D1 Mini. If you don’t need the battery, recycle it.
- Cut six (6) 10 cm long wires and strip their ends (no more than 5 mm) If you have many colors, make four (4) white for the buttons, one (1) red for positive and one (1) black for negative.
- Secure the key fob ICB onto the first helping hands
- Secure the D1 Mini onto the second helping hands
- Plug your soldering iron into a wall outlet and get ready for some soldering!
Soldering on the key fob ICB
- Solder four (4) wires, one to each button position as pictured here where top-left is night mode, top-right is arm, bottom-left is panic mode and bottom-right is disarm. Take care to solder only the metal contacts and not the rest of the board!
- Solder one (1) wire to the positive battery terminal as pictured here (red wire)
- Solder one (1) wire to ground as pictured here (black wire)
Soldering on the D1 Mini
- Solder the disarm wire to the GPIO4 pin
- Solder the panic mode wire to the GPIO5 pin
- Solder the arm wire to the GPIO12 pin
- Solder the night mode wire to the GPIO13 pin
- Solder the positive battery terminal wire to the 3V3 (VCC) pin as pictured here
- Solder the negative battery terminal wire to the GND pin as pictured here
Home Assistant setup
- Remove the key fob ICB and the D1 Mini from the helping hands
- Connect the D1 Mini to your Home Assistant machine with a USB cable
- Go to the add-on store of your Home Assistant installation and install the ESPHome Device Builder add-on
- Once the add-on is installed, click Start and then Open Web UI
- Click New Device, enter
Ajax SpaceControlas a Name and follow the prompts to add the D1 Mini - Once the device is listed, click Edit to open the configuration editor
- Append the following YAML
- Click Save and Install to install the firmware to the D1 Mini
text_sensor:
  - platform: wifi_info
    ip_address:
      name: WiFi IP address
    ssid:
      name: WiFi SSID

  - platform: version
    name: Firmware version

sensor:
  - platform: wifi_signal
    name: WiFi Signal
    update_interval: 60s
    device_class: signal_strength

switch:
  - platform: gpio
    pin: GPIO4
    inverted: true
    id: relay_disarm
    name: Disarm
    icon: "mdi:shield-off"
    on_turn_on:
      - delay: 500ms
      - switch.turn_off: relay_disarm

  - platform: gpio
    pin: GPIO5
    inverted: true
    id: relay_panic
    name: Panic
    icon: "mdi:shield-alert"
    on_turn_on:
      - delay: 500ms
      - switch.turn_off: relay_panic

  - platform: gpio
    pin: GPIO12
    inverted: true
    id: relay_arm
    name: Arm
    icon: "mdi:shield-lock"
    on_turn_on:
      - delay: 500ms
      - switch.turn_off: relay_arm

  - platform: gpio
    pin: GPIO13
    inverted: true
    id: relay_night
    name: Night
    icon: "mdi:shield-moon"
    on_turn_on:
      - delay: 500ms
      - switch.turn_off: relay_night
Finishing up
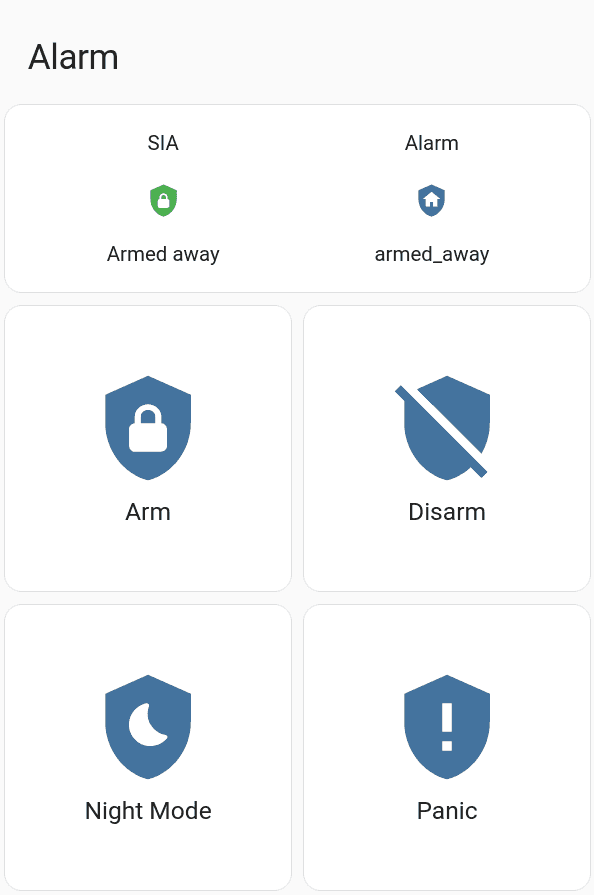
Here’s the YAML of a dashboard card to test things out:
type: vertical-stack
title: Alarm
cards:
  - type: glance
    entities:
      - entity: alarm_control_panel.45321_aaa_zone_1_alarm
        name: SIA
      - entity: input_select.alarm
        name: Alarm
  - type: grid
    columns: 2
    square: true
    cards:
      - show_name: true
        show_icon: true
        type: button
        tap_action:
          action: call-service
          service: input_select.select_option
          service_data:
            option: armed_away
            entity_id: input_select.alarm
        entity: input_select.alarm
        name: Arm
        show_state: false
        icon: mdi:shield-lock
      - show_name: true
        show_icon: true
        type: button
        tap_action:
          action: call-service
          service: input_select.select_option
          service_data:
            option: disarmed
            entity_id: input_select.alarm
        entity: input_select.alarm
        name: Disarm
        show_state: false
        icon: mdi:shield-off
      - show_name: true
        show_icon: true
        type: button
        tap_action:
          action: call-service
          service: input_select.select_option
          service_data:
            option: armed_night
            entity_id: input_select.alarm
        entity: input_select.alarm
        name: Night Mode
        icon: mdi:shield-moon
      - show_name: true
        show_icon: true
        type: button
        tap_action:
          action: none
        name: Panic
        icon: mdi:shield-alert
        hold_action:
          action: perform-action
          perform_action: input_select.select_option
          target:
            entity_id: input_select.alarm
Here’s how it looks:
Try restarting (not reloading) Home Assistant in case it doesn’t work.